How-to: Pass Experience and Donation Page Fees on to Donors
Customize how Experience and Donation Page fees are covered when you opt for Unlimited or Custom pricing.
If you're using RallyUp to fundraise and you've opted for Unlimited or Custom pricing, then RallyUp charges a Platform Fee to cover the costs of running our site. We’ve also partnered with Stripe and PayPal, who charge a small fee for their payment processing services:
- RallyUp’s Platform Fee: This fee covers RallyUp’s operating costs instead of tips from donors.
- Payment processing fee: This is the standard fee for payment processing. Stripe or PayPal charge this fee. RallyUp does not benefit financially from the processing fees. We don’t get a percentage, surcharge, or any other fee. Learn more here: Understand: Debit and Credit Card Processing Fees.
Whether you're running an Experience or a Donation Page, Unlimited and Custom pricing give you options to pass these fees on to donors so you can raise more for your cause:
- Ask donors for tips (tipping is optional, and all tips go to your organization)
- Add a convenience fee to each donation
-
Platform Fee coverage:
- Have your organization cover the Platform Fee
- Require donors to cover the Platform Fee
- Give donors the option to cover the Platform Fee
-
Payment processing fee coverage:
- Have your organization cover the payment processing fees
- Require donors to cover the payment processing fees (available if you require donors to cover the Platform Fee)
- Give donors the option to cover the payment processing fees (available if you give donors the option to cover the Platform Fee)
Before You Begin
- If you're using Free pricing, there's no Platform Fee and you won't be able to pass payment processing fees on to donors.
- We recommend selecting only one way to pass fees on to donors: asking for tips, OR charging a convenience fee, OR asking/requiring donors to cover the Platform Fee/processing fees. Donors are typically happy to help cover fundraising costs, but multiple surcharges may frustrate donors and discourage donations.
Donor Tipping
With Unlimited and Custom pricing, tips from donors go to your organization instead of to RallyUp. You can enable or disable donor tipping anytime.
Enable Tips
- Select Experiences or Donation Pages from the left menu.
- If you're updating an Experience, click on the Experience title (list view) or Experience image (grid view). If you're updating a Donation Page, click on the Donation Page title.
- If you're updating an Experience, go to Options in the timeline at the top and select Pricing Options. If you're updating a Donation Page, go to Checkout in the timeline at the top.
- Scroll down to Allow donors to add a tip to their donations and click on the toggle to move it to the right:

- Customize the tipping options you want to offer donors, as well as the tipping question headline and description:
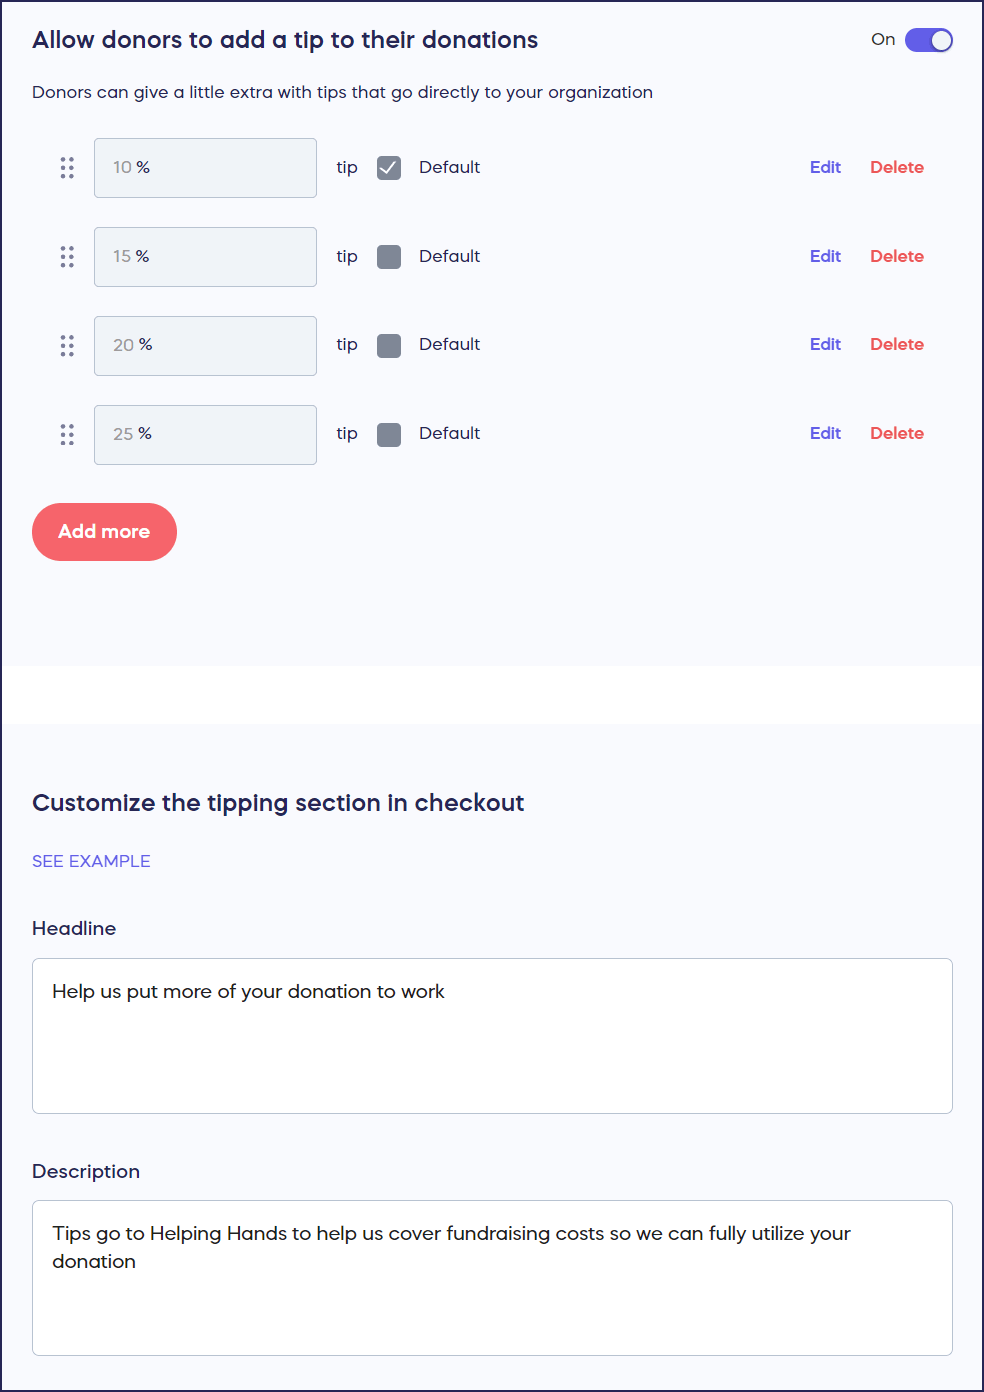
- Select Save.
Disable Tips
- Select Experiences or Donation Pages from the left menu.
- If you're updating an Experience, click on the Experience title (list view) or Experience image (grid view). If you're updating a Donation Page, click on the Donation Page title.
- If you're updating an Experience, go to Options in the timeline at the top and select Pricing Options. If you're updating a Donation Page, go to Checkout in the timeline at the top.
- Scroll down to Allow donors to add a tip to their donations and click on the toggle to move it to the left:

- Select Save.
Add a Convenience Fee
With this option, a fee is added to each donation to help offset costs, and donors cannot opt out. Your organization keeps the donation amount minus whatever the convenience fee doesn't cover. If the convenience fee fully covers all fees and there's some left over, your organization keeps that money. You can choose to add a flat dollar amount to each donation or calculate the fee as a percentage of the donation amount.
- Select Experiences or Donation Pages from the left menu.
- If you're updating an Experience, click on the Experience title (list view) or Experience image (grid view). If you're updating a Donation Page, click on the Donation Page title.
- If you're updating an Experience, go to Options in the timeline at the top and select Pricing Options. If you're updating a Donation Page, go to Checkout in the timeline at the top.
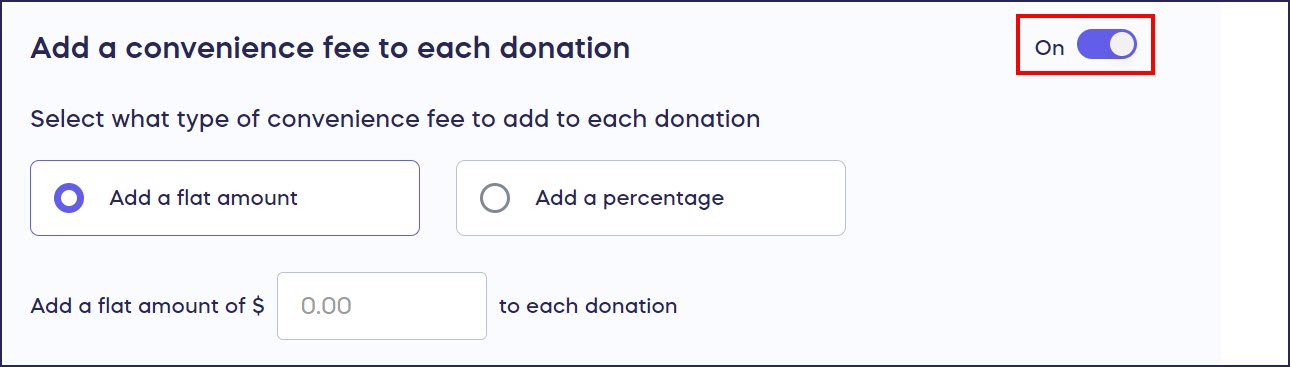
- Scroll down to Add a convenience fee to each donation and click on the toggle so it shifts to the right:
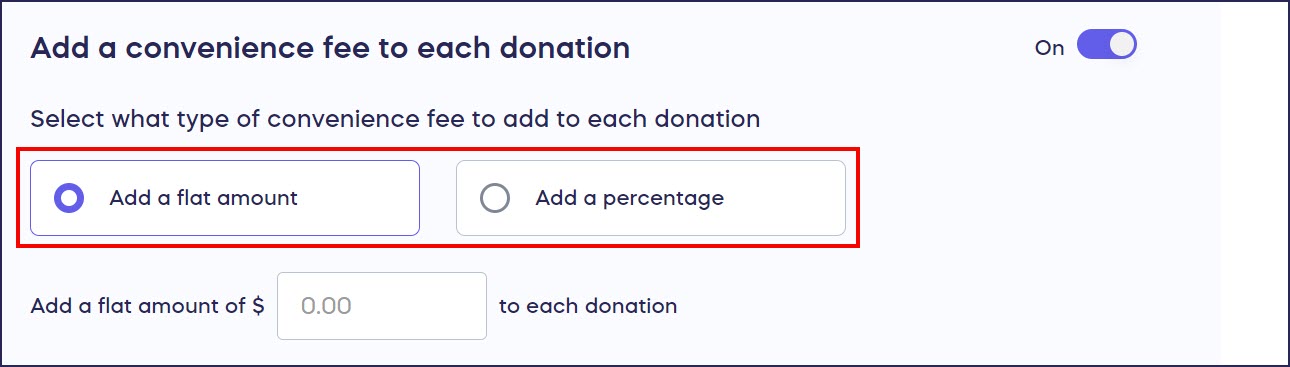
- Choose whether to add the fee as a flat amount or a percentage:
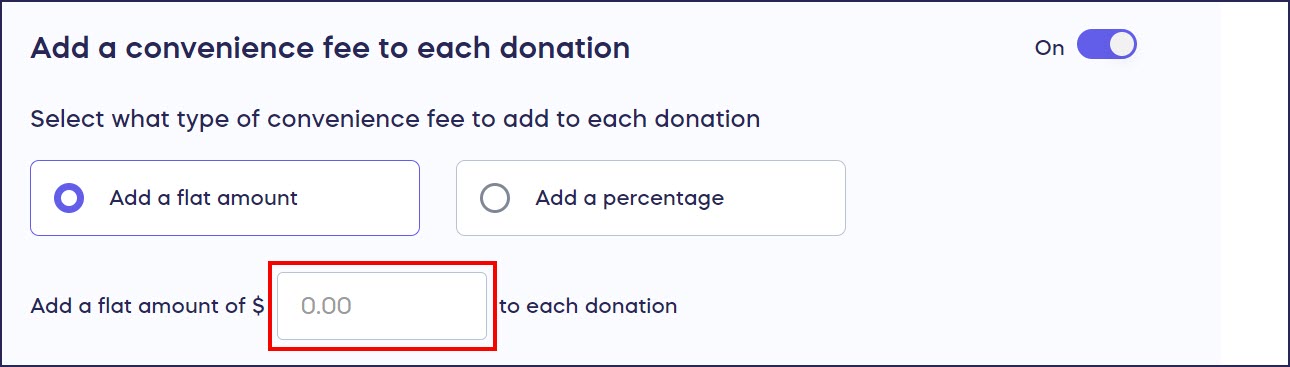
- Enter the flat amount or percentage amount:
- Select Save.
Platform Fee
Have Your Organization Cover the Platform Fee
With this option, the fee is automatically taken out of the amount raised.
- Select Experiences or Donation Pages from the left menu.
- If you're updating an Experience, click on the Experience title (list view) or Experience image (grid view). If you're updating a Donation Page, click on the Donation Page title.
- If you're updating an Experience, go to Options in the timeline at the top and select Pricing Options. If you're updating a Donation Page, go to Checkout in the timeline at the top.
- Scroll down to Would you like to pass the Platform Fee on to donors? and select No, automatically deduct the fee from the funds raised:
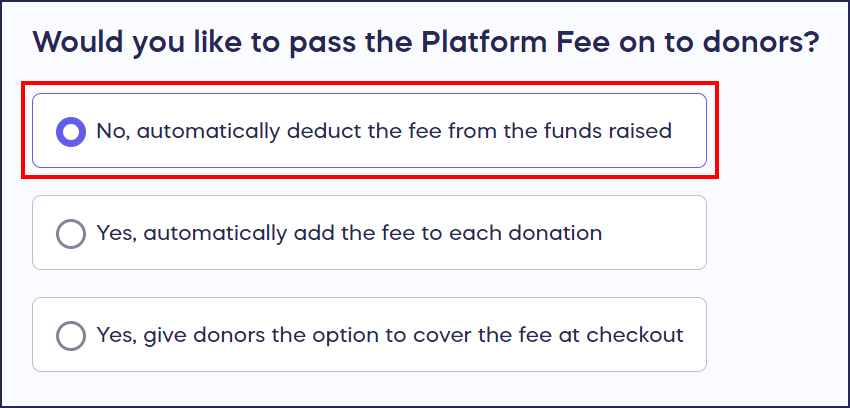
- Select Save.
Require Donors to Cover the Platform Fee
With this option, the fee(s) are automatically added to the donation, and donors cannot opt out.
- Select Experiences or Donation Pages from the left menu.
- If you're updating an Experience, click on the Experience title (list view) or Experience image (grid view). If you're updating a Donation Page, click on the Donation Page title.
- If you're updating an Experience, go to Options in the timeline at the top and select Pricing Options. If you're updating a Donation Page, go to Checkout in the timeline at the top.
- Scroll down to Would you like to pass the Platform Fee on to donors? and select Yes, automatically add the fee to each transaction:
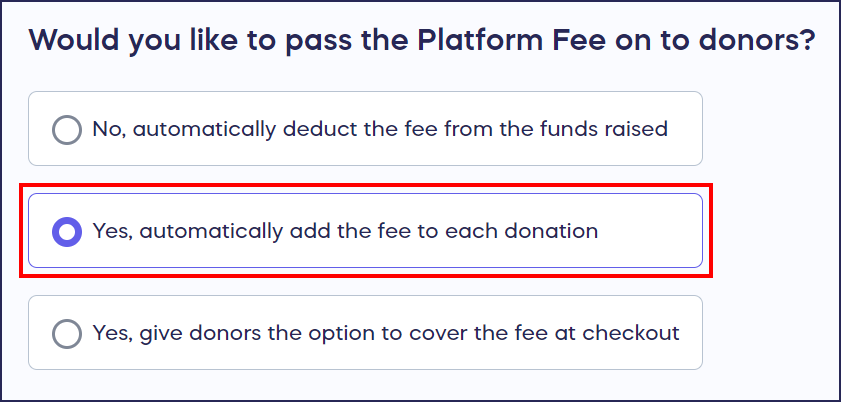
- Select Save.
Give Donors the Option to Cover the Platform Fee
With this option, the fee is only added to the donation if the donor gives their consent. Your organization is responsible for paying the fee if the donor declines to cover it.
- Select Experiences or Donation Pages from the left menu.
- If you're updating an Experience, click on the Experience title (list view) or Experience image (grid view). If you're updating a Donation Page, click on the Donation Page title.
- If you're updating an Experience, go to Options in the timeline at the top and select Pricing Options. If you're updating a Donation Page, go to Checkout in the timeline at the top.
- Scroll down to Would you like to pass the Platform Fee on to donors? and select Yes, give donors the option to cover the fee at checkout:

- Select Save.
Payment Processing Fee
Have Your Organization Cover the Processing Fee
With this option, the fee is automatically taken out of the amount raised. Your organization receives the donation amount minus the fee.
- Select Experiences or Donation Pages from the left menu.
- If you're updating an Experience, click on the Experience title (list view) or Experience image (grid view). If you're updating a Donation Page, click on the Donation Page title.
- If you're updating an Experience, go to Options in the timeline at the top and select Pricing Options. If you're updating a Donation Page, go to Checkout in the timeline at the top.
- Scroll down to Automatically add the payment processing fee to each transaction. This setting is disabled by default, but if you previously enabled it, you can turn it off by clicking on the toggle so it shifts to the left:

- Select Save.
Require Donors to Cover the Processing Fee
With this option, the fee is automatically added to the donation, and donors cannot opt out. Note that this setting is only available if you also require donors to cover the Platform Fee.
- Select Experiences or Donation Pages from the left menu.
- If you're updating an Experience, click on the Experience title (list view) or Experience image (grid view). If you're updating a Donation Page, click on the Donation Page title.
- If you're updating an Experience, go to Options in the timeline at the top and select Pricing Options. If you're updating a Donation Page, go to Checkout in the timeline at the top.
- Scroll down to Automatically add the payment processing fee to each transaction and click on the toggle so it shifts to the right:

- Select Save.
Give Donors the Option to Cover the Processing Fee
With this option, the fee is only added to the donation if the donor gives their consent. Your organization is responsible for paying the fee if the donor declines to cover it. Note that this setting is only available if you give donors the option to cover the Platform Fee but don't require them to cover it.
- Select Experiences or Donation Pages from the left menu.
- If you're updating an Experience, click on the Experience title (list view) or Experience image (grid view). If you're updating a Donation Page, click on the Donation Page title.
- If you're updating an Experience, go to Options in the timeline at the top and select Pricing Options. If you're updating a Donation Page, go to Checkout in the timeline at the top.
- Scroll down to Include the payment processing fee when asking donors to cover the Platform Fee and click on the toggle so it shifts to the right:

- Select Save.
Additional Knowledge Base Articles
Have more questions? Submit a ticket