How-to: Export Donation and Donor Reports
Export information about each donation you receive and the donors who gave them.
RallyUp has made it easy to export reports of all of your donations, including all of the information collected on donors and any fees that may apply. You can use this information to learn more about your donors and reconcile your Campaign once it’s finished. Reports download in .csv format so you can use Excel or Google Sheets to edit your reports.
Understand: What Exported Reports Look Like
Insights: Common Excel and Google Sheets Formatting Tips for RallyUp Reports
Export a Report
- Go to Campaigns in the left menu.
- If you have chosen a list view, click on the Campaign title. If you have chosen a grid view, click on the Campaign image.
- Select View Donations*.
- Use the Donations*, Donors*, and Ledger tabs to navigate between reports:
![]()
- Select Export in the lower-left corner of the screen to download a full report:
![]()
Donations Tab
The Donations tab automatically displays the following:
- Date (date and time the donation was given)
- Donor Name
- Donation Amount
- Status (Paid, Pending, or Voided)
- Payment Type
You can download one report from this tab:
Donations Report
The exported report includes the following:
- Payment ID (unique number assigned to each transaction)
- Donor Full Name
- Donor First Name
- Donor Last Name
- Donor Email
- Contribution Date
- Last Updated Date
- Paid Date (date/time payment received)
- Amount (includes donations and Perks purchases)
- Flat Amount (donations)
- Item Amount (only applies if donor purchased Raffle or Sweepstakes entries, Perks, Event tickets, Sale or Auction items, etc.)
- Tip Amount (only displays if you've opted for Flex pricing and enabled Donor Tipping)
- RallyUp Fee (only applies if you elect to pay RallyUp's Platform Fee)
- Processing Fee (charged by the payment processor)
- Payment Processor (Stripe or PayPal)
- Fees Paid by Donor
- After Fees (amount your organization receives after fees are deducted)
- Status (Paid, Pending, or Voided)
- Payment Type
- Processing Type (Managed or Direct Funds)
- Source (Manual or RallyUp; payment processed through RallyUp or added manually)
- Fund Code (only applies if you added a Fund Code to your Campaign)
- Custom Field (only applies if you created a custom question for donors to answer during checkout)
- Anonymous Donation? (Yes or No)
- Comment (only applies if you allow donors to leave comments when they donate)
- Cancellation Reason (only applies to canceled donations)
- Donor ID (unique number assigned to each donor account)
Donors Tab
The Donors tab automatically displays the following:
- Donor Name
- Donor Email
- Total Amount Donated
You can download one report from this tab:
Donors Report
The exported report includes the following:
- Donor Name
- Donor Email
- Campaign (Campaign name)
- Last Contribution Date (also includes time)
- Gross Contributions (total amount given)
- Net Contributions (total amount given minus any fees deducted)
- Donor ID (unique number assigned to each donor account)
Ledger Tab
The Ledger tab automatically displays the following:
- Date (date/time payment received or refunded)
- Payment ID (unique number assigned to each transaction)
- Donor Name
- Donation Amount
- Payment Type (Payment or Refund)
You can download two reports from this tab:
Ledger Report
The exported report includes the following:
- Payment ID (unique number assigned to each transaction)
- Donor Full Name
- Donor First Name
- Donor Last Name
- Donor Email
- Date (date/time payment received or refunded)
- Amount (includes donations and Perks purchases)
- RallyUp Fee (only applies if you elect to pay RallyUp's Platform Fee)
- Processing Fee (charged by the payment processor)
- Fees Paid by Donor
- Net Amount (amount your organization receives after fees are deducted)
- Payment Type
- Processing Type (Managed or Direct Funds)
- Source (Manual or RallyUp; payment processed through RallyUp or added manually)
- Currency (3-letter currency code)
- Fund Code (only applies if you added a Fund Code to your Campaign)
- Type (Payment or Refund)
- Refund Reason (only applies to refunds)
Subledger Report
The exported report includes the following:
- Payment ID (unique number assigned to each transaction)
- Donor Full Name
- Donor First Name
- Donor Last Name
- Donor Email
- Date (date/time payment received or refunded)
- Item Name (only applies to purchased items)
- Item Fundraising Type (fundraising activity associated with the item, e.g., Raffle)
- Quantity (number of each item purchased)
- Total Item Amount (total amount paid for item, excluding fees)
- RallyUp Fee (only applies if you elect to pay RallyUp's Platform Fee)
- Processing Fee (charged by the payment processor)
- Net Amount (amount your organization receives after fees are deducted)
- Payment Type
- Processing Type (Managed or Direct Funds)
- Source (Manual or RallyUp; payment processed through RallyUp or added manually)
- Currency (3-letter currency code)
- Fund Code (only applies if you added a Fund Code to your Campaign)
- Type (Payment or Refund)
View Details for Individual Donations/Donors
- Select Campaigns from the left menu.
- If you have chosen a list view, click on the Campaign title. If you have chosen a grid view, click on the Campaign image.
- Select View Donations*.
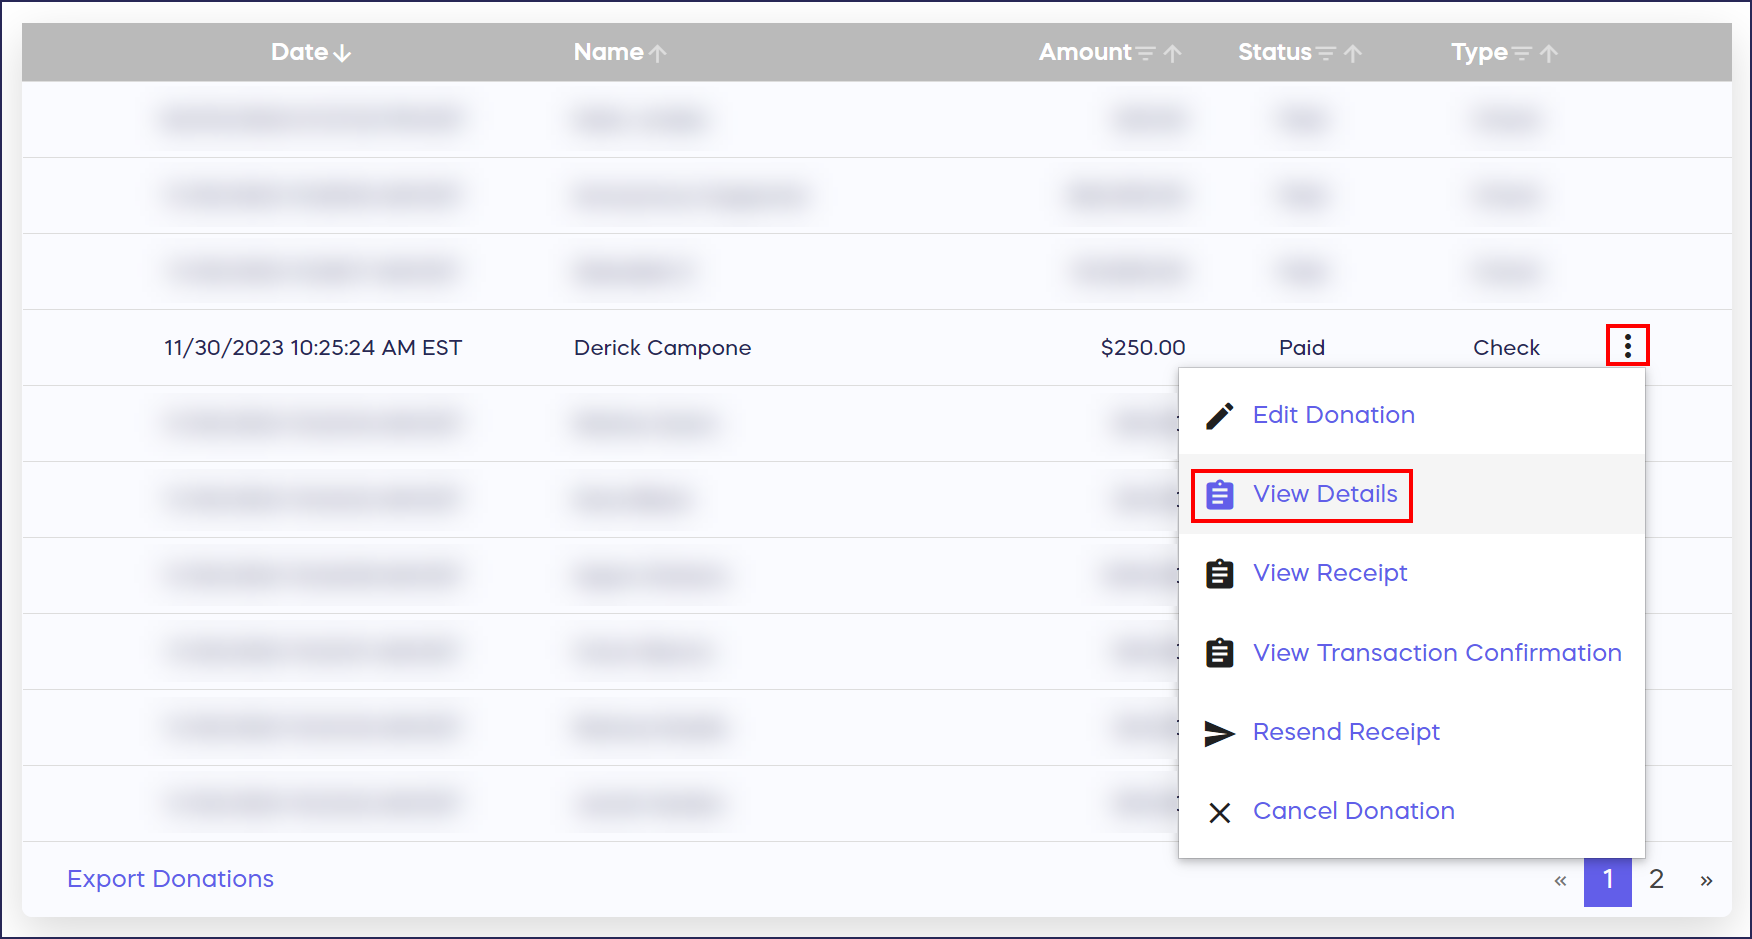
- Hover your mouse pointer over the donor or donation you wish to view and select the three-dot icon on the right.
- Select View Details:
Early Donations
There may be times when you receive donations before your fundraiser starts. RallyUp allows you to add these donations to your records before going live, so they can be included in your total amount raised.
- Go to Campaigns in the left menu.
- If you have chosen a list view, click on the Campaign title. If you have chosen a grid view, click on the Campaign image.
- Select Campaign Setup.
- Go to Options in the timeline at the top and select Campaign Options.
- Scroll down to Have you received early donations that you want to include in the amount raised before going live?, check the box, and enter the total early donation amount:
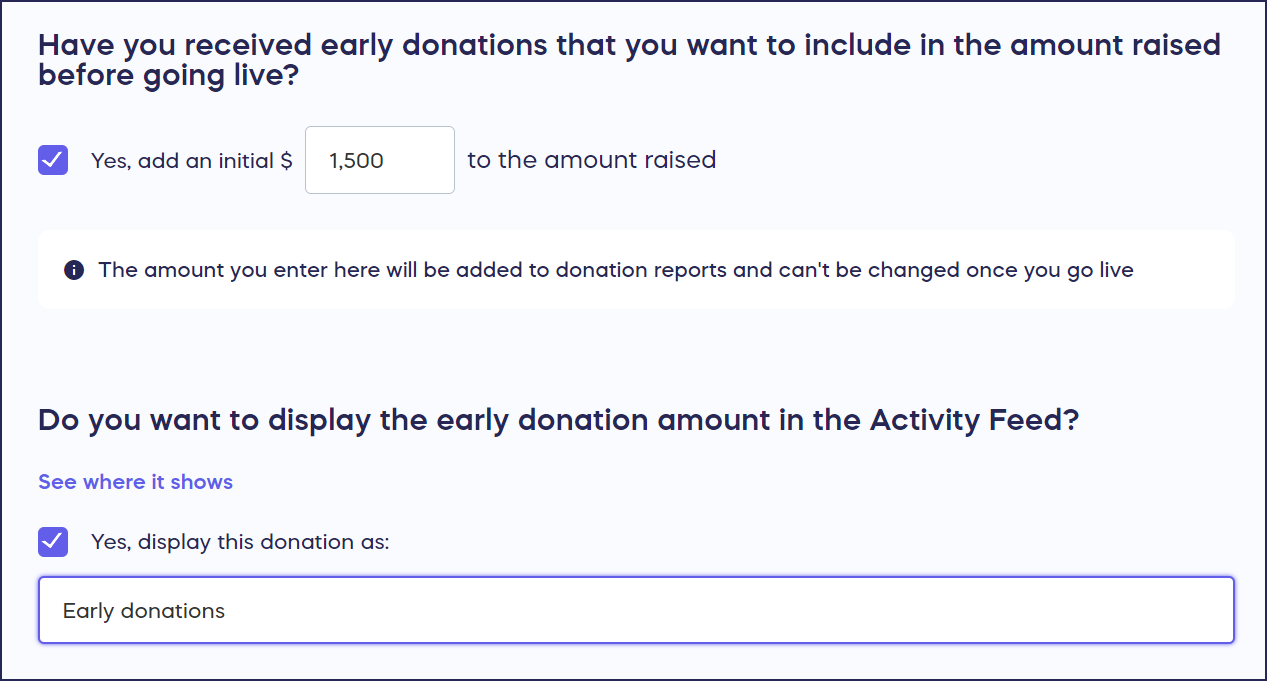
The amount you enter here will be included in the Donations report, labeled as Seed Amount in the Payment Type column. Note that this amount can't be changed after you go live.

*Terminology may differ according to Campaign settings.
Have more questions? Submit a ticket