How-to: Check In Event Attendees and A-Thon or Peer-to-Peer Participants
Check in attendees or participants for your in-person Event or A-Thon.
Whether you're running a gala, jog-a-thon, conference, or other in-person fundraiser, it’s easy to check in attendees or participants from your RallyUp account. Marking people as checked in when they arrive can help you manage attendance and keep accurate reports.
If you're running an A-Thon or Peer-to-Peer fundraiser, you can check in participants manually. If you're running an Event, you can check in attendees manually or enable QR code check-in.
Manual Check-In
- Select Campaigns from the left menu.
- If you have chosen a list view, click on the Campaign title. If you have chosen a grid view, click on the Campaign image.
- To check in Event attendees, select View Ticket Registrations*. To check in A-Thon or Peer-to-Peer participants, select View Participants*.
- Type the person’s name into the search bar.
- Click on the three-dot menu on the right and select Mark as checked in:

You can see which attendees are checked in by looking at the Checked In column in the table. You can also export a spreadsheet of all attendee data.
QR Code Check-In
QR code check-in is currently only available for Events. You'll need to enable QR code check-in when you set up your Campaign to use it during your Event.
Enable QR Code Check-In
- Select Campaigns from the left menu.
- If you have chosen a list view, click on the Campaign title. If you have chosen a grid view, click on the Campaign image.
- Select Edit Campaign.
- Go to Ticketing in the timeline at the top.
- Scroll down to Expand optional settings and click on the down arrowhead (⌄).
- Scroll down to Enable QR code check-in and click on the toggle to move it to the right:

Donor View
When donors purchase tickets, their QR code(s) will be included in their registration email:

You can enable QR code check-in anytime, even if your Campaign is already live. Please note, however, that anyone who purchased Event tickets before you enable this setting won't have a QR code. In this case, you'll need to resend the registration emails for each purchase.
Resend QR Code
If an attendee purchased a ticket before QR code check-in was enabled, or if they lost their QR code, you can easily resend it anytime.
- Select Campaigns from the left menu.
- If you have chosen a list view, click on the Campaign title. If you have chosen a grid view, click on the Campaign image.
- Select View Ticket Registrations*.
- Type the person’s name into the search bar.
- Click on the three-dot menu on the right and select Resend registration email:

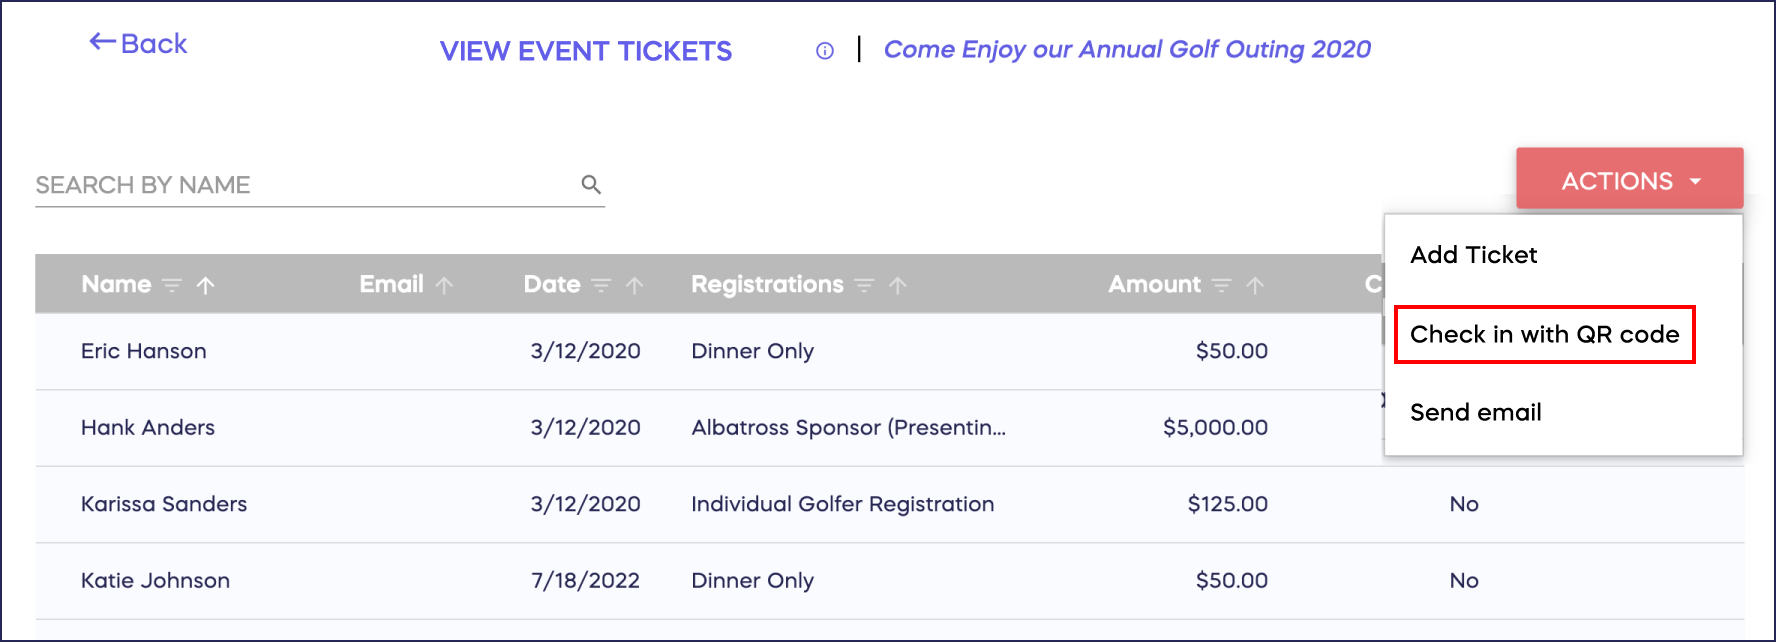
Scan a QR Code
To use QR code check-in, you'll need a device with a built-in camera, such as a cell phone or tablet.
- Select Campaigns from the left menu.
- If you have chosen a list view, click on the Campaign title. If you have chosen a grid view, click on the Campaign image.
- Select View Ticket Registrations*.
- Click on ACTIONS and select Check in with QR code:
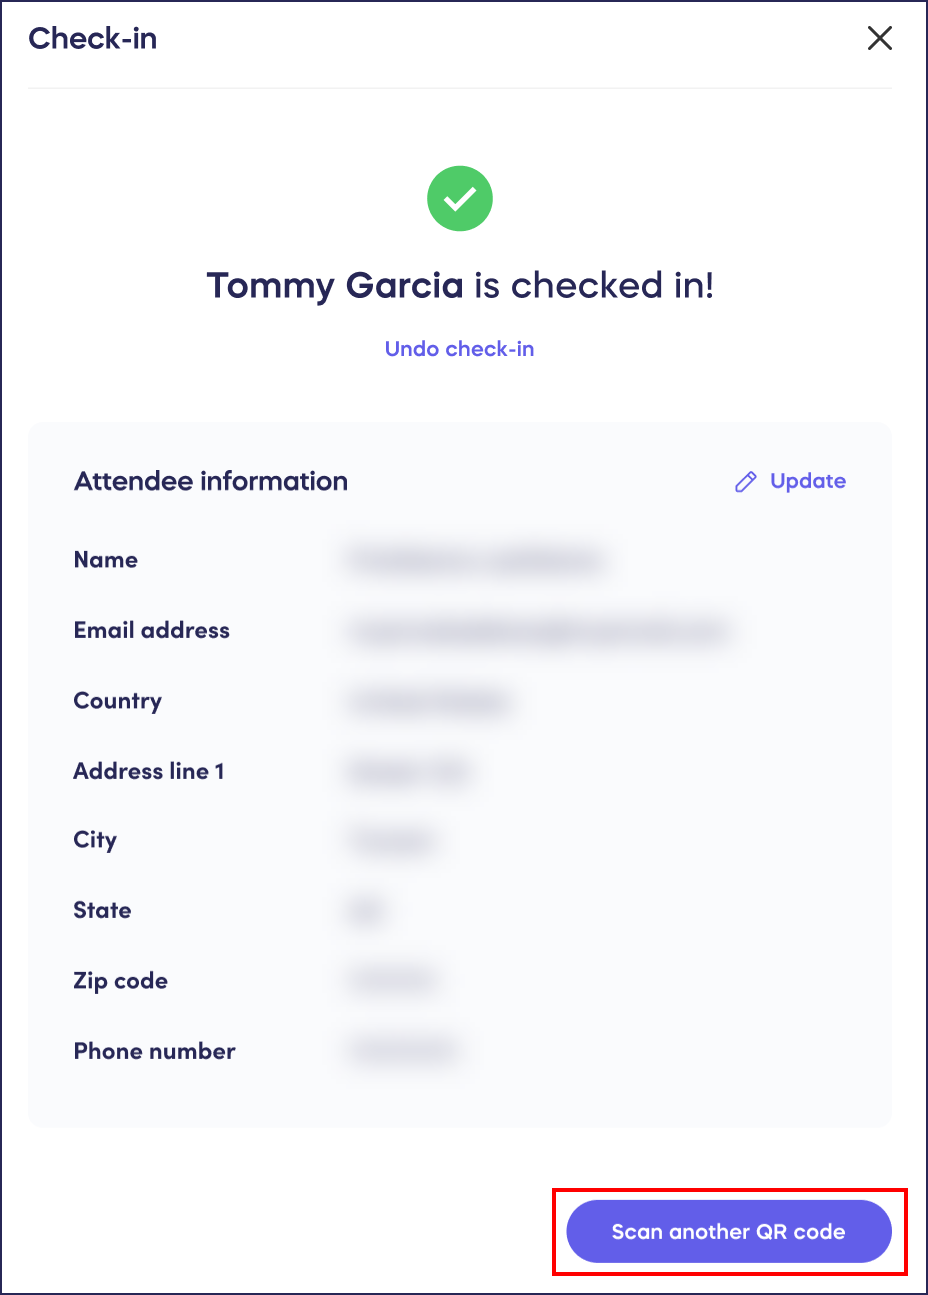
- Select the camera you want to use and, if necessary, grant permission for RallyUp to access the camera:

- Scan a QR code to check in an attendee. When they're checked in, select Scan another QR code:
Good to Know
- Marking an attendee or participant as checked in helps with reporting and management but does not affect payments or donations.
*Terminology may differ according to Campaign settings.
Have more questions? Submit a ticket